How to Reverse Sear a Steak: The Butcher's Method for Perfect Results Every Time
For decades, the standard advice for cooking a steak went something like this: get your pan screaming hot, sear both sides to build a crust, then finish in the oven to bring the interior to temperature. It works. Millions of good steaks have been cooked that way.
But there's a better method that produces more consistent results, gives you a wider window of doneness control, and creates a crust that's every bit as good — often better. It's called the reverse sear, and once you try it, you'll wonder why anyone ever did it the other way.
I've been behind a butcher counter for three decades, and the reverse sear is what I tell every customer who asks me how to cook a thick steak at home. Not because it's trendy — because it's the most forgiving technique that still delivers restaurant-quality results.
What Is the Reverse Sear?
The reverse sear is exactly what it sounds like: you reverse the traditional order of operations. Instead of searing first and finishing in the oven, you start the steak in a low-temperature oven and finish with a hard sear on the stovetop.
Traditional method: Sear → Oven → Rest
Reverse sear: Oven → Sear → Rest (brief)
That simple flip changes everything about the final result. The low oven gently brings the interior to your target temperature while simultaneously drying the surface. When you move the steak to a ripping hot pan, that dry surface creates a faster, more intense Maillard reaction — the chemical process that creates the brown, savory crust everyone chases.
The result is a steak with edge-to-edge even color (no gray band of overcooked meat under the crust) and a sear that rivals any steakhouse.
The Science Behind Why It Works
Understanding the science helps you troubleshoot and adapt the technique. Three principles make the reverse sear superior:
1. Moisture evaporation. A low oven (200-275°F) slowly evaporates surface moisture from the steak over 30-60 minutes. A dry surface is the single most important factor in achieving a great sear. When you drop a traditionally cooked steak into a hot pan, much of the pan's energy goes into boiling off surface moisture instead of browning the meat. With a reverse-seared steak, the surface is already dry — so browning starts immediately.
2. Gentle heat penetration. Low oven temperatures mean heat moves slowly into the steak's center. This gives you an enormous window of control. The difference between 125°F (rare) and 135°F (medium) might be 15-20 minutes in a 250°F oven, giving you plenty of time to check and pull at the perfect moment. In a traditional sear-first method, that same temperature jump happens in 2-3 minutes — much easier to overshoot.
3. Enzyme activity. Between 100-120°F, naturally occurring enzymes (cathepsins) in beef actively tenderize the muscle fibers. In a traditional cook, the steak blasts through this temperature range in seconds. In a reverse sear, the meat sits in this tenderizing zone for 15-20 minutes, producing a noticeably more tender result — especially in cuts that aren't naturally butter-soft.
Which Cuts Work Best for Reverse Searing
The reverse sear works on any steak, but it truly shines with certain cuts and thicknesses:
Ideal cuts (1.5 inches or thicker):
- Ribeye — the marbling bastes the meat during the low-oven phase, amplifying flavor
- New York strip — the fat cap renders beautifully during the slow cook
- Filet mignon — the gentle heat prevents this lean cut from drying out
- Porterhouse and T-bone — handles the dual-muscle challenge (strip side and tenderloin side cook at different rates)
- Tomahawk — the bone acts as a heat sink; reverse sear is the only reliable method for these thick monsters
- Coulotte — the fat cap side renders perfectly during the oven phase
Works but not necessary (under 1.25 inches):
- Flank steak — thin enough to cook through with sear alone
- Flat iron — works either way due to natural tenderness
- Hanger steak — typically thin enough for direct sear
The thickness rule: If your steak is under 1.25 inches thick, a traditional sear is fine. The reverse sear advantage increases with thickness. A 2-inch ribeye reverse seared will dramatically outperform the same cut cooked traditionally. A 3/4-inch sirloin won't show much difference.
Equipment You Need
One of the best things about the reverse sear is how little you need:
- Oven — any home oven works. Set it as low as it goes (most bottom out at 170-200°F)
- Wire rack + sheet pan — the rack elevates the steak so air circulates underneath, promoting even cooking and surface drying
- Instant-read thermometer — non-negotiable. This technique relies on pulling the steak at a precise internal temperature. A $15 Thermapen or similar saves you from guessing
- Cast iron skillet — the best material for the final sear because it holds heat when cold meat hits it. A carbon steel pan also works. Stainless steel is fine but requires more preheating
- High smoke-point oil — avocado oil, refined safflower, or ghee. Save the extra virgin olive oil and butter for basting after the sear starts
Step-by-Step Reverse Sear Method
Here's the complete process. Once you've done it twice, it becomes second nature.
Step 1: Season and Temper
Season your steak generously with kosher salt — about 3/4 teaspoon per pound. If you have time, salt it and leave it uncovered on a wire rack in the fridge for 2-24 hours. This dry-brine approach seasons the meat throughout and further dries the surface. If you're short on time, salt it 45 minutes before cooking and let it sit at room temperature.
Add pepper after cooking, not before. Black pepper burns at the temperatures needed for a good sear, turning bitter. Season with pepper during the rest.
Step 2: Low and Slow in the Oven
Set your oven to 200-275°F. Lower temperatures give you more control but take longer. Here's my recommendation by cut thickness:
- 1.5 inches: 250°F for 30-40 minutes
- 2 inches: 250°F for 40-55 minutes
- 2.5 inches: 225°F for 50-65 minutes
- 3+ inches (tomahawk): 200°F for 60-80 minutes
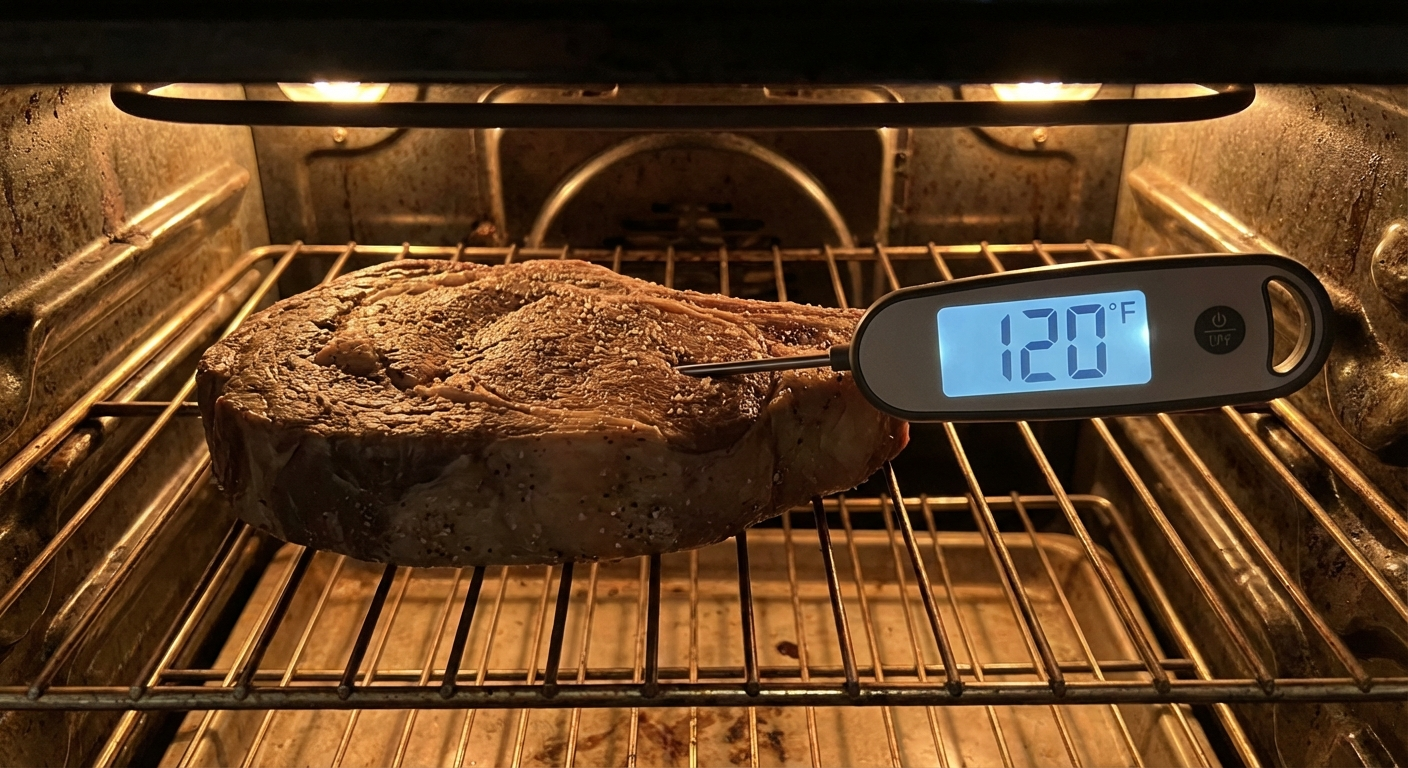
Place the steak on a wire rack set over a sheet pan. Put it in the oven and check the internal temperature starting about 10 minutes before you expect it to be done.
Pull temperatures (pull 10-15°F below final target):
- Rare (final 125°F): pull at 110-115°F
- Medium-rare (final 130°F): pull at 115-120°F
- Medium (final 140°F): pull at 125-130°F
- Medium-well (final 150°F): pull at 135-140°F
Why pull so early? The searing step will add 10-15°F to the internal temperature. This is the key adjustment that trips up beginners — if you pull your steak at 130°F and then sear it for 2 minutes per side, you'll end up at 145°F (medium) instead of the medium-rare you wanted.
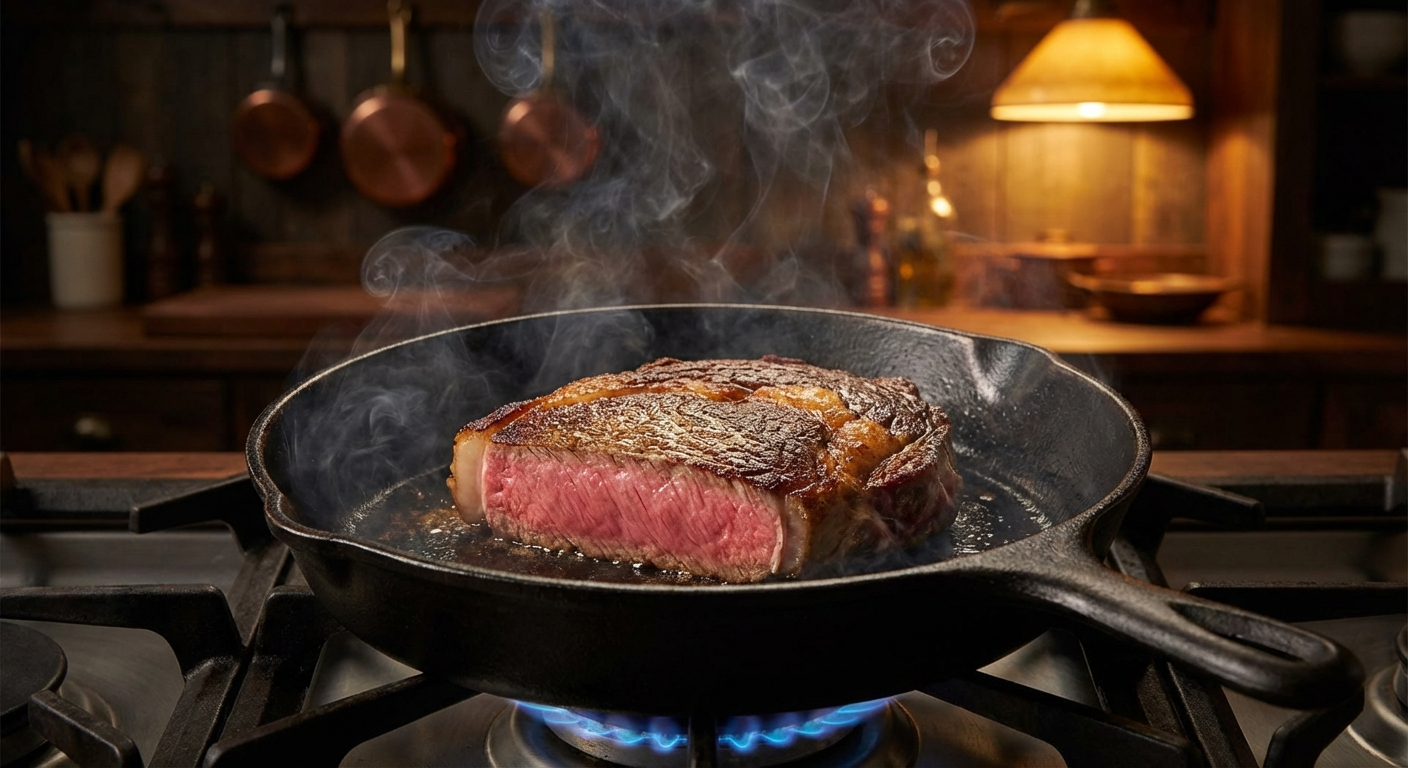
Step 3: The Sear
While the steak rests briefly out of the oven (2-3 minutes while your pan heats), get your cast iron skillet ripping hot. Set it over the highest heat your burner produces for 3-4 minutes. Add a thin layer of high smoke-point oil just before the steak goes in.
Sear for 45-90 seconds per side. You're building crust, not cooking the interior — that's already done. Press the steak gently to ensure full contact with the pan surface.
For extra flavor, add butter, crushed garlic cloves, and fresh thyme or rosemary to the pan during the last 30 seconds and baste the steak by tilting the pan and spooning the foaming butter over the top.
Don't forget the edges. Hold the steak with tongs and sear the fat cap and sides for 15-20 seconds each. This is where most home cooks leave flavor on the table.
Step 4: Rest (But Less Than You Think)
Because the steak cooked gently from the inside out, the muscle fibers are already relaxed and juices are evenly distributed. You only need 3-5 minutes of rest — much less than the 10-15 minutes required after a traditional cook. The gentle oven phase essentially accomplishes the resting process while the steak is still cooking.
Add freshly cracked black pepper and flaky finishing salt (Maldon or fleur de sel) during the rest.
Reverse Sear vs. Traditional Sear: The Real Differences
Here's an honest comparison after cooking both methods thousands of times:
Edge-to-edge doneness: Reverse sear wins decisively. A traditionally seared steak has a gradient from well-done (gray outer ring) to your target doneness in the center. A reverse-seared steak is the same pink from edge to edge, with only a thin crust separating the interior from the surface.
Crust quality: Tie, with a slight edge to reverse sear. The drier surface browns faster, meaning you get comparable crust in less time — which means less heat penetrates inward during the sear.
Tenderness: Reverse sear wins. The extended time in the enzyme-active temperature zone (100-120°F) provides noticeable additional tenderizing.
Forgiveness: Reverse sear wins by a mile. The gentle temperature curve gives you a 15-20 minute window to hit your target. Traditional methods give you 2-3 minutes before overcooking.
Speed: Traditional sear wins. A traditional sear-to-oven method finishes a steak in 12-15 minutes. A reverse sear takes 45-75 minutes. If you're in a hurry, the traditional method still works fine.
Thin steaks: Traditional sear wins. Steaks under 1.25 inches don't benefit from the reverse sear and may overcook in the oven before the surface dries properly.
Common Mistakes and How to Avoid Them
Mistake 1: Oven temperature too high. Setting the oven to 325°F or higher defeats the purpose. The steak cooks too fast, you lose the control advantage, and the surface doesn't dry properly. Stay at 275°F or below.
Mistake 2: Not preheating the skillet enough. Your pan needs to be violently hot. If you don't hear an aggressive sizzle the instant the steak hits the pan, it's not hot enough. Let the pan heat for a full 3-4 minutes over maximum heat.
Mistake 3: Pulling at final target temperature. Remember, the sear adds 10-15°F. Pull from the oven at least 10°F below where you want to end up. This is the most common mistake and the reason people complain about ending up with medium when they wanted medium-rare.
Mistake 4: Searing too long. The sear should take 45-90 seconds per side. You're building crust, not cooking. Anything over 2 minutes per side will start pushing heat into the interior and creating that gray band you were trying to avoid.
Mistake 5: Skipping the wire rack. Placing the steak directly on a sheet pan means the bottom sits in its own juices. This prevents surface drying and leads to uneven cooking. Always use a wire rack.
Reverse Sear on the Grill
No oven? No problem. The reverse sear works beautifully on a charcoal or gas grill using indirect heat.
Charcoal grill: Push all coals to one side. Place the steak on the cool side (no coals underneath), close the lid with the vents positioned over the steak to draw heat across it. Maintain 225-250°F on the cool side. When the steak hits your pull temperature, move it directly over the coals for 45-60 seconds per side.
Gas grill: Light one burner on high, leave the others off. Place the steak over the unlit burners, close the lid, and maintain 225-250°F. When ready, move to the lit burner for the sear. For extra crust, have a cast iron skillet preheating on the hot burner.
The grill version adds smoke flavor during the low-and-slow phase, which is an advantage the oven method doesn't have. If you're using a charcoal grill, add a few wood chunks (oak, hickory, or cherry) to the coals for a subtle smoky flavor that pairs perfectly with beef.
Frequently Asked Questions
Can I reverse sear a frozen steak? Yes, and it actually works surprisingly well. Place the frozen steak directly in a 250°F oven on a wire rack. It will take roughly 50% longer to reach your pull temperature, but the results are nearly identical to starting from fresh. The extended oven time means even more surface drying, which can produce an exceptional sear.
Do I need to rest a reverse-seared steak? Only briefly — 3-5 minutes. The gentle oven cooking means juices are already well-distributed, so the extended rest period of traditional cooking isn't necessary.
What about dry-aged steaks? The reverse sear is arguably the best method for dry-aged beef. Dry-aged steaks are already drier on the surface, so the sear happens even faster and more intensely. Reduce the sear time by about 15 seconds per side.
Can I use a sous vide instead of the oven? Yes — sous vide is essentially a more precise version of the oven phase. Cook the steak in a bag at your exact target temperature, pat it bone-dry with paper towels, then sear. The results are excellent, but the oven method has the advantage of naturally drying the surface, while sous vide steaks come out wet and need thorough drying before searing.
What USDA grade works best? Choice or Prime. The reverse sear's slow oven phase renders intramuscular fat (marbling) more effectively than fast cooking methods, so higher-marbled steaks benefit even more. That said, the technique also helps leaner Select-grade steaks by maximizing tenderness through the enzyme activity zone.
Frequently Asked Questions
What temperature should the oven be for reverse searing?
Set your oven between 200-275°F. Lower temperatures (200-225°F) give you more control and are best for very thick steaks (2.5+ inches). 250°F is the sweet spot for most 1.5-2 inch steaks, balancing control with reasonable cook times of 30-55 minutes.
How thick should a steak be for reverse searing?
At minimum 1.25 inches, ideally 1.5 inches or thicker. Steaks under 1.25 inches cook too quickly in the oven and may overshoot your target temperature before the surface dries properly. The thicker the steak, the more dramatic the reverse sear advantage.
Can you reverse sear a steak without a cast iron skillet?
Yes. Carbon steel pans work equally well. Stainless steel works but requires longer preheating. In a pinch, you can even use a very hot grill for the searing step. The key is any surface that holds intense heat — avoid nonstick pans as they cannot reach the temperatures needed for a proper Maillard crust.
Why is my reverse-seared steak overcooked?
The most common cause is pulling the steak from the oven at your final target temperature instead of 10-15°F below it. The searing step adds significant heat to the interior. For medium-rare (130°F final), pull from the oven at 115-120°F.
How long does a reverse sear take from start to finish?
Plan for 45-75 minutes total depending on steak thickness. A 1.5-inch steak at 250°F takes about 30-40 minutes in the oven plus 5 minutes for searing and resting. A 2.5-inch cut can take 50-65 minutes in the oven. The extra time over traditional methods is the tradeoff for significantly better results.
More Expert Guides
What Is Chateaubriand? (Cut, Cooking, & Best Sources)
Chateaubriand is a thick-cut roast from the center of the beef tenderloin, traditionally served for two. Learn what makes this classic French cut special and how to cook it.
14 min readWhat Is Round Steak? The Complete Guide to Beef's Most Versatile Budget Cut
Round steak comes from the rear leg of the cow — it's lean, affordable, and misunderstood. A master butcher breaks down every sub-cut, cooking method, and technique to turn this budget workhorse into genuinely delicious meals.
14 min readWhat Is Eye of Round? The Complete Butcher's Guide to This Lean Cut
Eye of round is one of the leanest, most affordable cuts in the entire beef case — and one of the most misunderstood. A butcher explains how to turn this budget-friendly roast into something genuinely delicious.